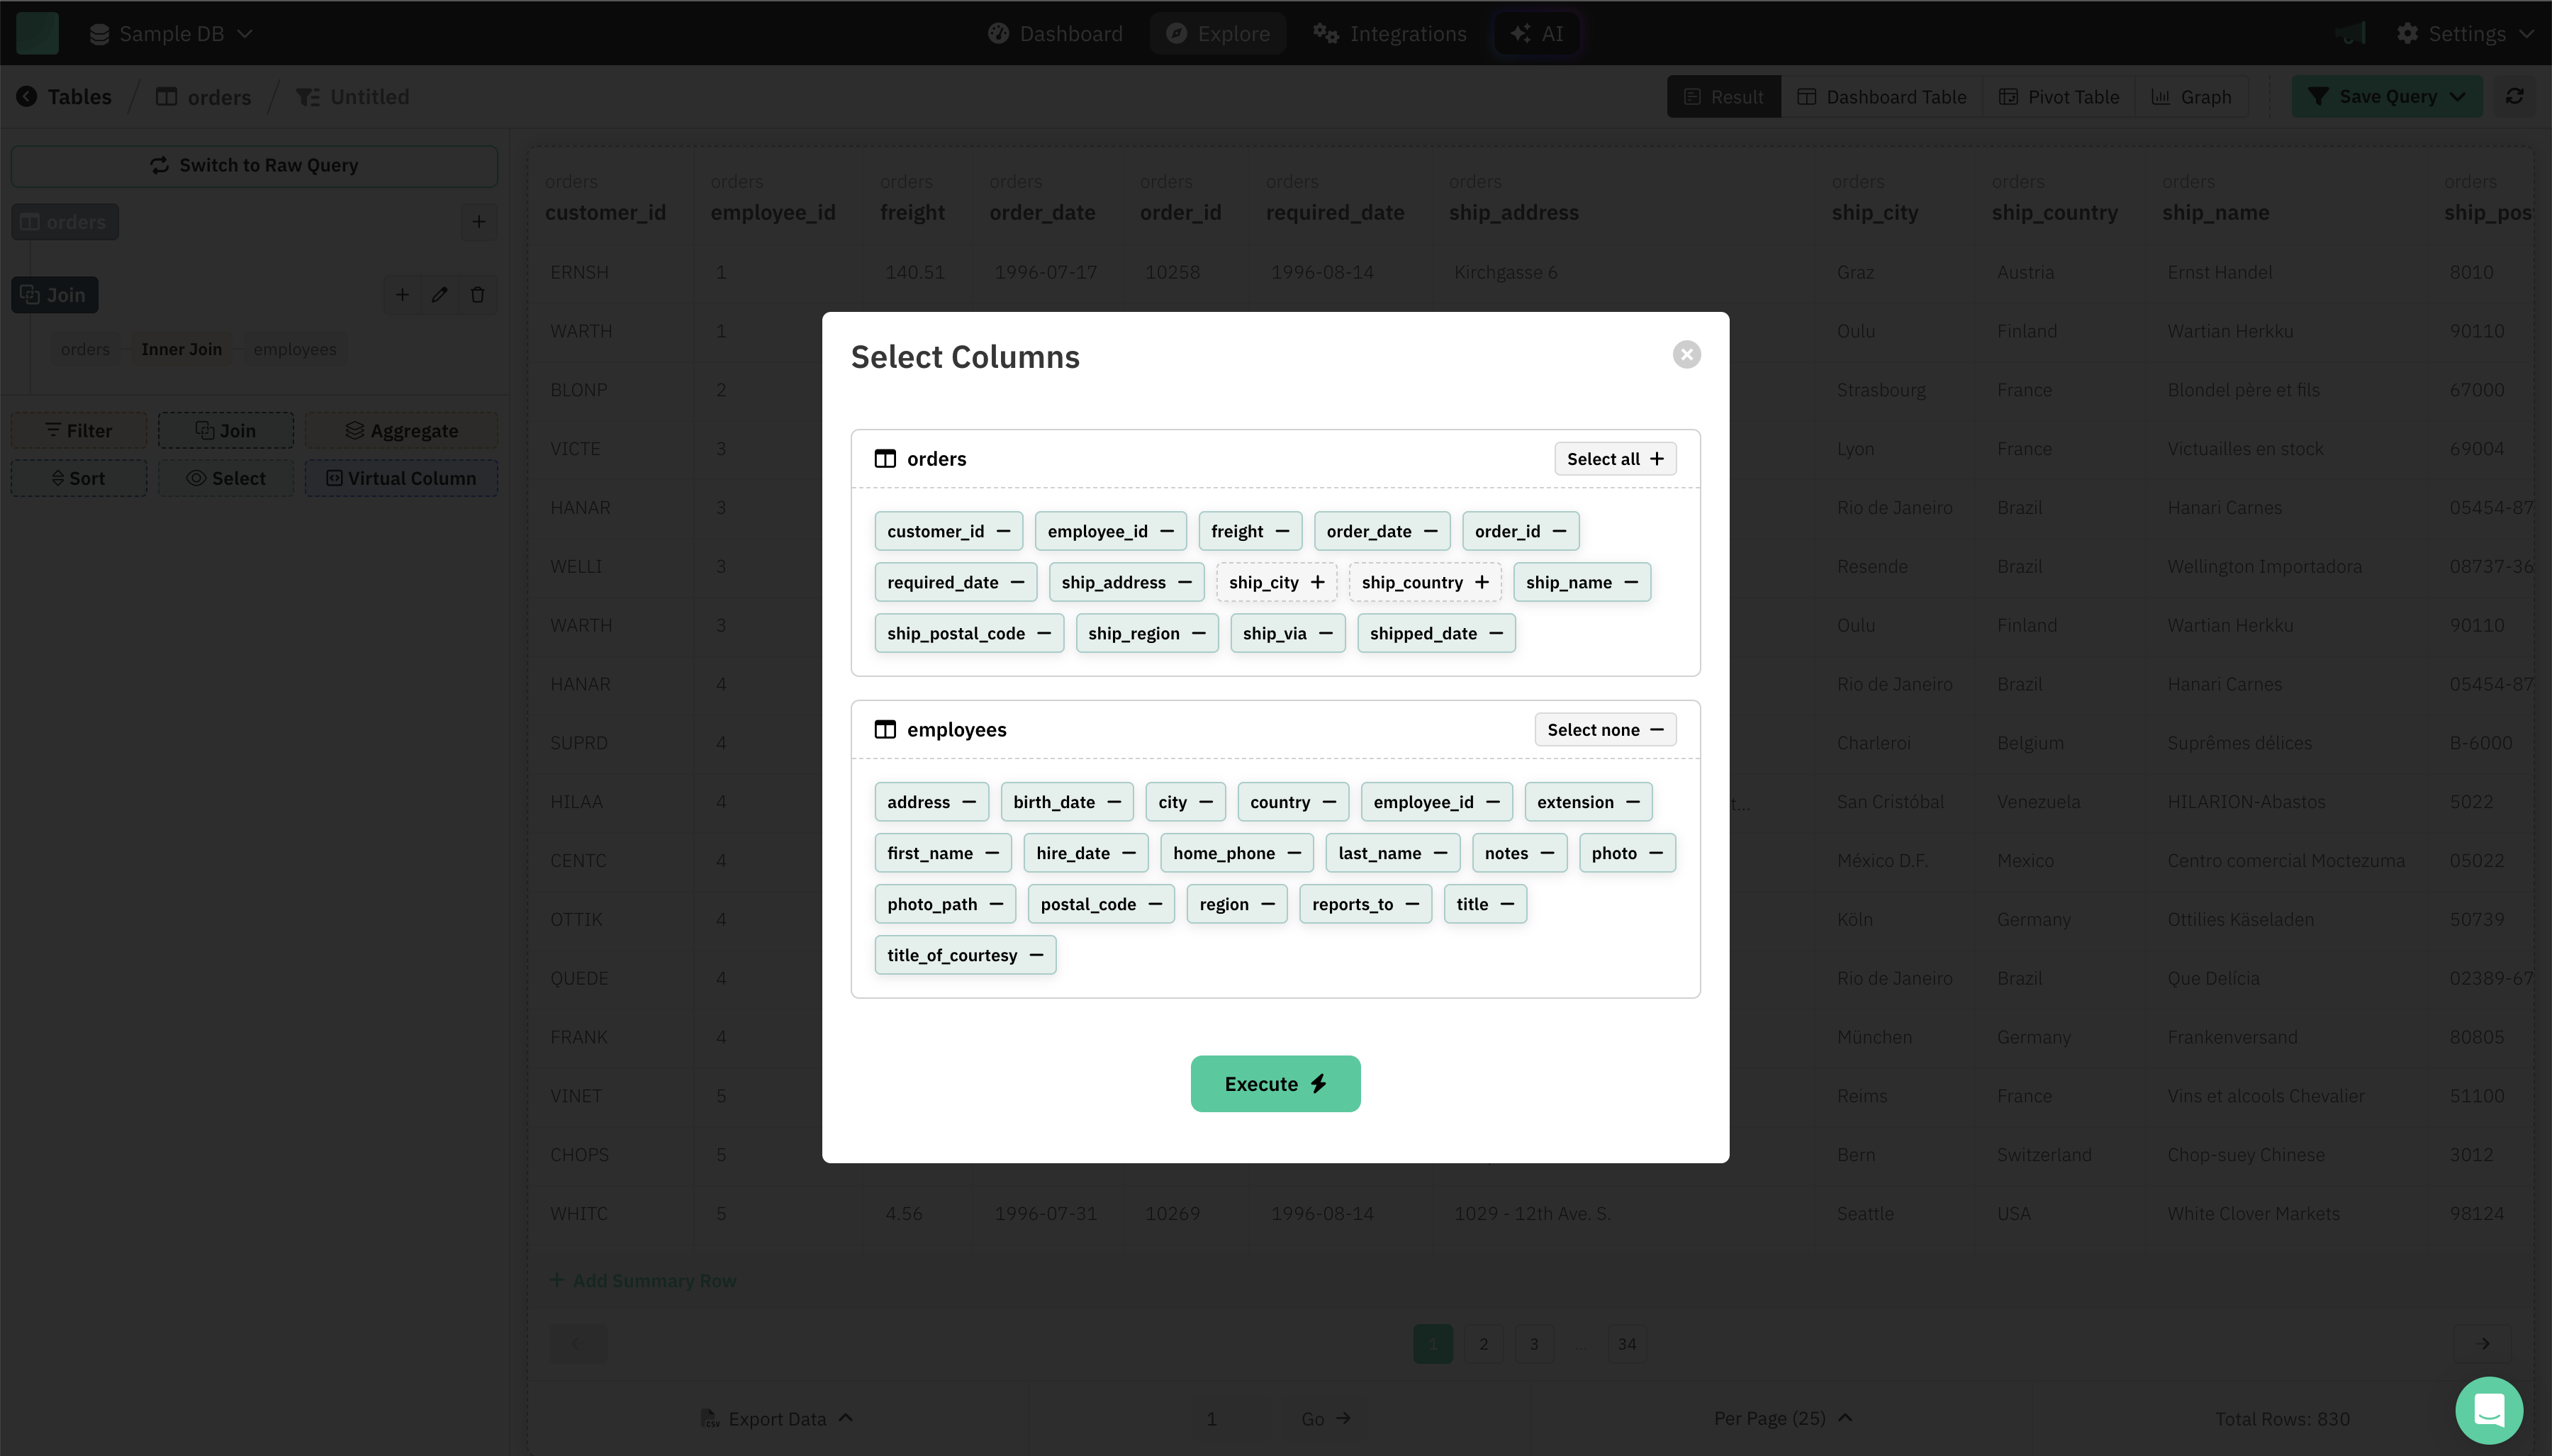
Query Builder > Select
Select fields to appear in SQL Result
Draxlr’s Select feature gives you full control over the columns that appear in your result set.
Whether you’re working with a single table or have joined multiple tables, you can easily customize your output to show just the fields you care about.

How to Use the Select Columns Feature?
-
Open the Select Modal
- Click on Select in the left sidebar.
- The "Select Columns" dialog will open, showing all available fields from every table included in your query (including joined tables).
-
Pick Your Columns
- Each table is shown in its own section (e.g.,
orders,employees). - To include a column in your result:
- Click the column name so it appears as selected (with a tag and a "–" button to remove).
- To remove a column from the result:
- Click the "–" button next to the column name.
- Use Select all to quickly include all columns from a table, or Select none to clear all.
- Each table is shown in its own section (e.g.,
-
Review Your Selection
- Selected columns are highlighted and will be included in your query result.
- You can mix and match columns from any table involved in your query (main table and all joined tables).
-
Execute the Selection
- Once you’re satisfied, click Execute.
- Your data table will refresh, showing only the columns you chose.
Tips
- Customize your results: Only see the data you actually need.
- Works with joins: All columns from all tables in your query are available.
- Bulk select/deselect: Speed up setup with Select all / none.